Air Fryer Roasted Garlic (Whole Bulbs & Cloves)

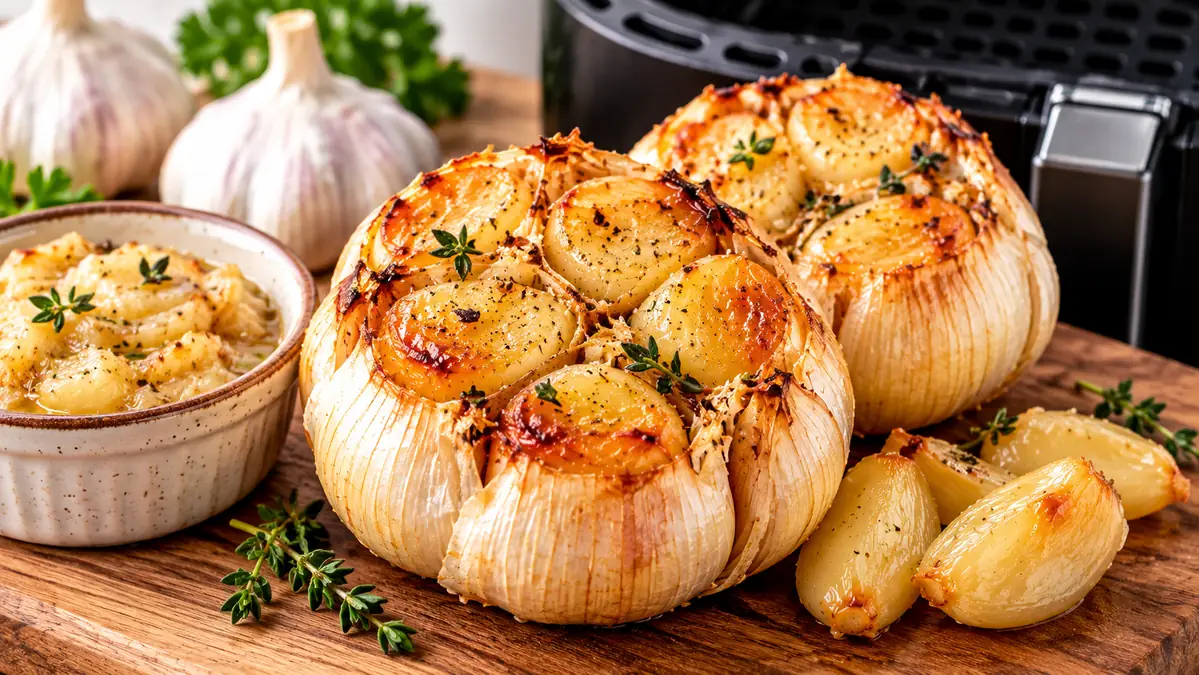
Making air fryer roasted garlic is an easy way to turn sharp, raw garlic into soft, golden cloves with a mellow, slightly sweet flavor. You can spread the garlic on bread, mix it into butter, or stir it into mashed potatoes, pasta, and sauces.
For whole garlic bulbs, start at 375°F for approximately 20–30 minutes, checking after 20 minutes. If you have individual peeled cloves instead, use a covered, air-fryer-safe container at 350°F for approximately 15–20 minutes.
The goal is garlic that feels soft enough to mash with a fork—not dark, crunchy, or bitter.
Here’s how to make both versions without drying out the cloves.
Air Fryer Roasted Garlic (Whole Bulbs)
Ingredients
Equipment
Method
- Remove loose outer skin while keeping each garlic bulb intact. Trim approximately 1/4 inch from the pointed top to expose the cloves.
- Place each bulb cut-side up. Drizzle 1 teaspoon olive oil over each bulb; add optional salt.
- Wrap each bulb securely in foil only if your air fryer permits foil, or use a small covered air-fryer-safe cooking dish. Keep required airflow space and foil away from the heating element.
- If required by your appliance, preheat the air fryer to 375°F.
- Cook protected bulbs at 375°F for approximately 20–30 minutes, checking at 20 minutes and continuing in 3–5-minute intervals until cloves are soft and mash easily.
- Carefully remove the garlic, avoiding trapped steam. Cool approximately 10 minutes or until safe to handle.
- Squeeze the softened cloves from their skins, mash, and serve as a spread or use in recipes.
Notes
This post contains affiliate links.
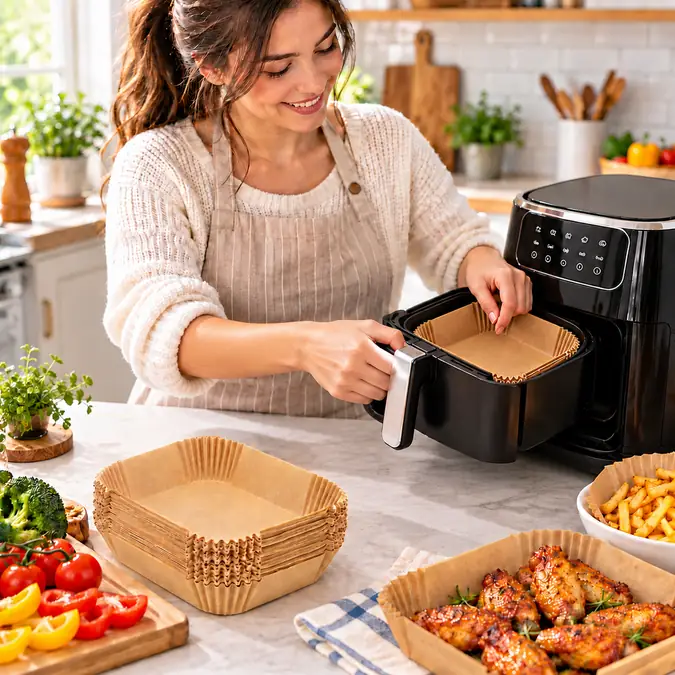
Ninja DZ201 Foodi 8-Quart Dual Basket Air Fryer
- Two independent baskets: cook a main and a side at once
- Fits a family-size meal in one go
- Easy-clean, dishwasher-safe baskets
As an Amazon Associate I earn from qualifying purchases.
How Long Does Roasted Garlic Take in an Air Fryer?
A whole garlic bulb usually takes about 20–30 minutes at 375°F when protected in an appropriate foil packet or covered oven-safe dish.
Individual peeled cloves generally need less time because they are smaller and more exposed to heat.
Always check the texture rather than relying on the timer alone. Roasted garlic is ready when the cloves are tender, lightly golden, and easy to mash.
Whole Garlic Bulbs vs. Peeled Cloves: Time and Temperature
| Garlic Preparation | Temperature | Approximate Time | Start Checking |
|---|---|---|---|
| Whole garlic bulb, enclosed | 375°F | 20–30 minutes | 20 minutes |
| Individual peeled cloves, enclosed | 350°F | 15–20 minutes | 10–12 minutes |
| Whole bulb, covered dish without foil | 350–375°F | 25–35 minutes | 20–25 minutes |
These times are starting estimates. The size of your garlic, your air fryer model, and the cooking container can change how long it takes.
A large garlic bulb may need extra time even when the smaller bulbs beside it are already soft.
Quick tip: If the cloves are still firm, keep cooking in 3–5-minute intervals instead of increasing the temperature sharply.
Why Garlic Size and Air Fryer Type Change the Cooking Time
Not every garlic bulb is the same size.
A small bulb has less garlic to heat through, so it may soften sooner. Larger bulbs have more cloves packed together and often need a little longer.
Air fryer designs also vary. Some models circulate hot air more aggressively, which can brown exposed garlic before the center becomes tender.
If you notice that your appliance cooks faster or slower than expected, our guide to adjusting air fryer cooking times explains what can affect the result.
What Ingredients and Equipment Do You Need?
You only need a few basic ingredients to make roasted garlic.
The whole-bulb recipe uses fresh garlic, olive oil, and a small amount of salt. You can add herbs or black pepper, but they are optional.
Choose Fresh, Firm Garlic
Look for garlic bulbs that feel firm and have mostly intact papery skins.
Avoid bulbs with soft, moldy, or badly damaged areas. A firm bulb with healthy-looking cloves is a better starting point.
For the main recipe, keep the garlic bulb together. You will trim the top to expose the cloves, but there is no need to peel each one separately.
If you already have a container of peeled garlic, use the individual-clove method later in this article.
Oil, Salt, and Optional Seasonings
Olive oil helps coat the exposed garlic and encourages gentle browning.
Use just enough to lightly cover the cut surface. The garlic does not need to sit in a pool of oil.
Salt is optional but adds a little flavor.
For variety, you can add a small pinch of black pepper, dried thyme, or rosemary. Keep the seasoning light if you plan to use the finished garlic in several different recipes.
Foil or a Small Oven-Safe Dish?
A wrapped garlic bulb needs protection from direct airflow so the cloves can soften without scorching.
If your air fryer manufacturer allows aluminum foil, you can securely wrap each bulb in a small packet.
However, not every air fryer manufacturer recommends foil. Check your appliance instructions before using it, keep foil away from the heating element, and never place loose foil in an empty preheating basket.
If foil is not recommended, use a small, properly rated oven-safe dish with a secure oven-safe lid that fits your air fryer. Keep the appliance’s required airflow clearance.
Do not use ordinary plastic lids, loosely placed paper coverings, or cookware that is not rated for the cooking temperature.
How to Roast a Whole Garlic Bulb in the Air Fryer
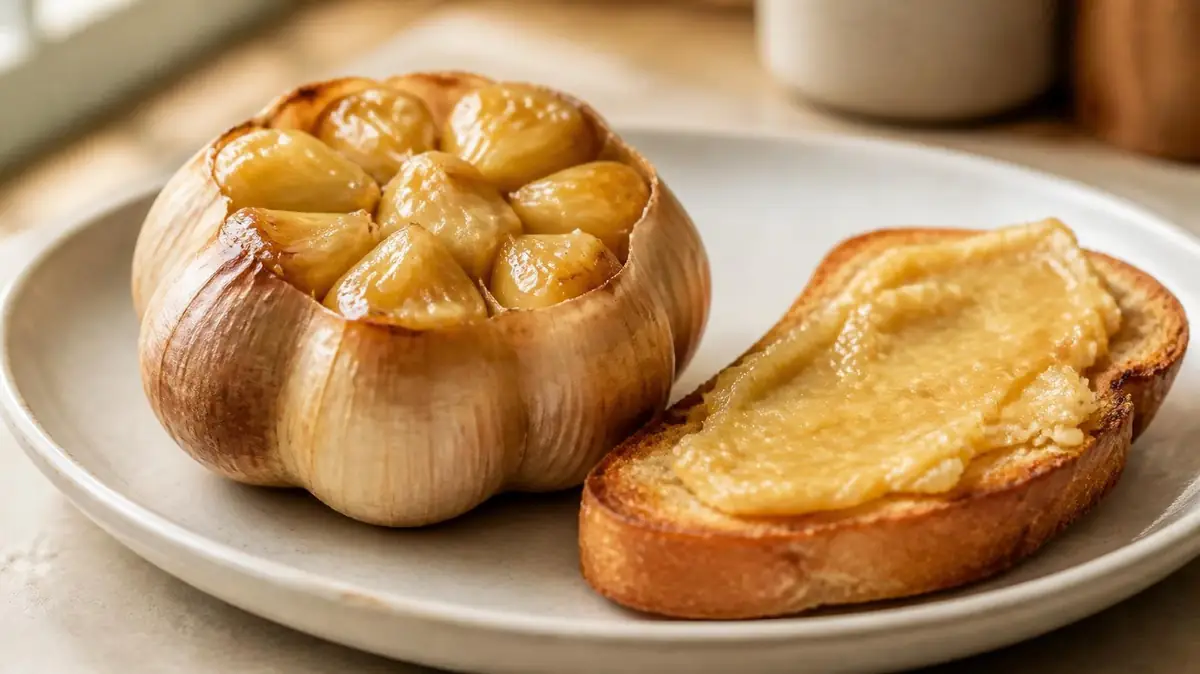
The whole-bulb method is the easiest option when you want several soft cloves without peeling them individually.
You prepare the entire head, protect it during cooking, and squeeze out the garlic once it cools.
Step 1: Trim the Top to Expose the Cloves
Place the garlic bulb on a cutting board with its pointed end facing up.
Remove any very loose outer paper, but keep the bulb intact.
Use a sharp knife to cut approximately ¼ inch from the pointed top, exposing the upper ends of most cloves.
You do not need to cut deeply into the garlic. Removing too much wastes the cloves and makes the bulb harder to handle.
Leave the flat root end in place so the garlic stays together during cooking.
Step 2: Add Olive Oil and Salt
Place the trimmed bulb on a piece of foil, if permitted by your air fryer, or inside a small covered cooking dish.
Drizzle approximately 1 teaspoon of olive oil over the exposed cloves.
Try to distribute the oil across the cut surface instead of pouring everything into one spot.
Add a small pinch of salt if desired.
You can also sprinkle a little thyme over the top, but avoid heavy seasoning. Roasted garlic develops plenty of flavor on its own.
Step 3: Wrap the Bulb Securely
If using foil, fold it around the garlic to make a secure packet.
The purpose is to help retain moisture and shield the cloves from direct heat.
Keep the packet compact and properly contained. It should not extend toward the heating element or block the basket’s airflow.
If your appliance does not permit foil, place the garlic in a small covered oven-safe dish instead.
Avoid leaving the exposed top completely uncovered throughout cooking. The surface may brown or dry out before the center softens.
Step 4: Air Fry Until the Cloves Are Soft
Preheat the air fryer to 375°F if your model requires preheating.
Place the protected garlic bulb in the basket, ensuring the packet or dish is stable.
Cook for approximately 20–30 minutes.
Start checking at the 20-minute mark. Carefully open the packet or lift the lid, keeping your face and hands away from escaping steam.
The cloves should look lightly golden and feel soft when gently pressed with a fork.
If the garlic is still firm, close the packet or dish and continue cooking for another 3–5 minutes.
You may need a few extra minutes for very large bulbs.
Step 5: Cool and Squeeze Out the Garlic
Once the garlic is tender, remove it carefully and place it on a heat-resistant surface.
Let it cool for approximately 10 minutes, or until comfortable to handle.
Gently squeeze the garlic from the root end toward the trimmed top. The soft cloves should slide out of their skins.
Transfer them to a small bowl and mash with a fork.
If the garlic does not squeeze out easily, it may need a little more cooking. However, allow it to cool enough to handle before trying again.
You now have a soft roasted garlic paste that can go straight into bread spreads, vegetables, or sauces.
How to Roast Individual Garlic Cloves in the Air Fryer
You can also roast peeled garlic cloves in the air fryer without keeping them attached to a whole bulb.
This method is useful when you have pre-peeled garlic or only need a small amount.
The important difference is that loose cloves have much more exposed surface area. They need protection from direct airflow and can brown faster than a whole head.
Prepare and Lightly Coat the Peeled Cloves
Use approximately 10–12 medium peeled garlic cloves for a small batch.
Check that the cloves are firm and free from spoilage.
Toss them with about 1 teaspoon of olive oil and a small pinch of salt.
The cloves should have a light coating rather than sitting submerged in oil.
You do not need to chop them. Leaving them whole helps them soften gradually.
Keep the Cloves Contained While Cooking
Place the peeled cloves in a small, shallow oven-safe dish with a secure oven-safe cover.
Alternatively, if your air fryer allows foil, make a secure packet that contains the cloves without packing them tightly together.
Do not scatter small cloves directly across a perforated basket. Some may fall through the openings or move around in the circulating air.
A covered container helps protect them from scorching while they become tender.
Cook at a Moderate Temperature and Check Early
Set the air fryer to 350°F.
Cook the covered peeled cloves for approximately 15–20 minutes, but start checking at 10–12 minutes because smaller cloves can soften sooner.
Gently test a clove with a fork.
If it is tender and mashes easily, the batch is ready. If the center is still firm, continue cooking in short intervals.
Smaller cloves may finish sooner than larger ones, so check a few different pieces.
Let the cloves cool briefly before using them.
Important: This is a lightly oiled roasted-garlic method, not traditional garlic confit. Garlic confit involves a different cooking process with cloves submerged in oil.
Can You Roast Garlic in an Air Fryer Without Foil?
Yes, you can roast garlic in an air fryer without foil. A small, covered, air-fryer-safe baking dish is a useful alternative.
The key is protecting the exposed cloves from drying out while allowing the air fryer to circulate heat around the container.
Using a Small Covered Baking Dish
Choose an oven-safe dish that fits inside your air fryer basket without touching the heating element or obstructing required airflow.
Prepare the garlic bulb as usual: trim the top, add a little oil, and place it cut-side up in the dish.
Secure the oven-safe lid.
Begin checking after about 20–25 minutes at 350–375°F. Larger bulbs or heavier dishes may require longer cooking.
Cook until the cloves are soft enough to spread.
Use oven mitts when removing the dish, and take care when lifting the lid because hot steam may escape.
Why Uncovered Garlic Can Burn or Dry Out
Garlic contains natural sugars that brown as it cooks.
When the cut surface receives strong direct heat and moving air, the exposed tips can become dark before the rest of the cloves turn soft.
That’s why an uncovered whole bulb may have dry edges and a firm center.
If your garlic is browning too quickly, reduce the temperature and protect the cut surface with an appropriate covered container.
The goal is tender, lightly golden garlic—not a heavily browned crust.
How Do You Know Air Fryer Roasted Garlic Is Done?
Roasted garlic is done when the cloves are soft, lightly golden, and easy to mash.
The center should not feel crunchy or hard.
You can test a clove with a fork or the tip of a small spoon once the garlic is cool enough to inspect safely.
Look for Soft, Spreadable Cloves
Properly roasted garlic should have a creamy texture.
When pressed with a fork, the flesh should flatten easily.
The flavor becomes milder and slightly sweeter than raw garlic, making it useful in spreads and sauces.
Don’t expect every clove to look deep brown. Light golden coloring with a soft interior is enough.
What if the Tops Are Brown but the Centers Are Firm?
This means the exposed surface is cooking faster than the inner cloves.
Lower the cooking temperature slightly, cover the bulb securely, and continue in short intervals.
Avoid turning up the heat to hurry the process. Higher heat may make the tips bitter without fixing the undercooked center.
Should Roasted Garlic Be Crispy?
No. This recipe is for soft roasted garlic.
If you want crunchy garlic chips, that is a different preparation with thinner pieces and different cooking requirements.
For spreading, mixing into butter, or blending into sauces, a soft texture is much more useful.
Why Is My Air Fryer Roasted Garlic Burnt, Dry, Bitter, or Still Hard?
Roasted garlic is fairly simple, but small differences in preparation can change the finished texture.
Use this troubleshooting table to identify what happened.
| Problem | Likely Reason | What to Do |
|---|---|---|
| Burnt, dark tips | High heat or too much direct airflow | Reduce the temperature and protect the garlic |
| Bitter flavor | Exposed cloves became over-browned | Remove scorched portions; roast more gently next time |
| Dry, tough cloves | Garlic lost too much moisture | Use a secure packet or covered dish |
| Firm center | Bulb is large or undercooked | Continue in short cooking intervals |
| Some cloves cook faster | Uneven clove sizes | Check individual pieces and remove tender ones |
| Garlic won’t squeeze out | Cloves are still firm or too hot to handle | Check tenderness and allow adequate cooling |
A Common Mistake: Cooking for Color Instead of Texture
You may be tempted to leave the garlic in the air fryer until the tops become dark brown.
That isn’t necessary.
Check whether the flesh is soft enough to mash. If it is, the garlic is ready even if the surface is only lightly golden.
Overcooking can turn its mellow flavor harsh or bitter.
What Can You Make With Air Fryer Roasted Garlic?
Roasted garlic works in many everyday dishes because its softer flavor blends easily with other ingredients.
Here are a few useful ways to serve it:
- Roasted garlic butter: Mash the cloves into softened butter with a little salt and chopped parsley.
- Garlic toast: Spread roasted garlic butter over bread before toasting. For another easy garlic-flavored side, try our air fryer Texas toast.
- Mashed potatoes: Stir in a few mashed cloves for mild garlic flavor without raw garlic pieces.
- Pasta sauce: Blend the garlic into tomato sauce or a creamy pasta sauce.
- Soup: Add a spoonful to blended vegetable soup for extra savory flavor.
- Hummus: Mix roasted garlic into prepared hummus for a smoother, mellower taste.
- Steak bites: Stir some roasted garlic into the finishing butter for our air fryer steak bites.
For a simple starter, spread the warm garlic over a slice of toasted bread with a little butter.
Because roasting softens the sharpness of raw garlic, you may prefer using several roasted cloves where you would normally use only a small amount of fresh garlic.
Adjust the quantity to your taste.
How Do You Store and Freeze Roasted Garlic Safely?
Refrigerate roasted garlic promptly and use it within 3–4 days, or freeze it for longer storage.
Garlic mixed with oil needs particular care. Homemade garlic-in-oil preparations should never be left on the counter for storage.
Refrigerating Leftover Roasted Garlic
Allow the garlic to cool enough for safe handling, then transfer it to a clean, airtight container.
Refrigerate it within 2 hours of cooking, or within 1 hour if the surrounding temperature is above 90°F.
Keep your refrigerator at 40°F or below and use the roasted garlic within 3–4 days.
Labeling the container with the preparation date makes it easier to remember when to use it.
Do not leave roasted garlic sitting in an open dish overnight.
Freezing Roasted Garlic in Small Portions
Freezing is useful if you have roasted several bulbs and cannot use them within a few days.
Squeeze the garlic into a bowl and mash it into a paste.
Divide the paste into small portions using a freezer-safe tray or container. Once frozen, transfer the portions to suitable freezer packaging and label the date.
You can then take out a small amount whenever you need roasted garlic for soup, potatoes, or sauce.
For the best convenience, freeze the portions separately instead of putting one large lump of mashed garlic into a container.
Is It Safe to Store Roasted Garlic in Olive Oil?
You can mix roasted garlic with oil for immediate use, but homemade garlic-in-oil mixtures must not be stored at room temperature.
Garlic is a low-acid food. When it is immersed in oil, the low-oxygen environment can create conditions that allow dangerous bacteria to produce botulinum toxin.
Roasting the garlic does not make a homemade garlic-in-oil mixture safe for pantry storage.
For non-acidified homemade garlic-in-oil:
- Refrigerate immediately at 40°F or below.
- Use within 4 days maximum.
- Freeze for longer storage.
- Never assume that a sealed jar makes it shelf-stable.
If a garlic-in-oil mixture has been stored improperly at room temperature, discard it rather than tasting it to check whether it is safe.
These precautions apply whether the garlic was roasted or raw before being mixed with oil.
Frequently Asked Questions
Can I Roast Garlic in an Air Fryer Without Peeling It?
Yes. Keep the whole bulb intact, trim the pointed top, add oil, and roast it in an approved covered container. After cooling, squeeze the soft cloves out of their skins.
Do I Need to Preheat the Air Fryer Before Roasting Garlic?
Follow your model’s instructions. Preheating can make cooking times more predictable, but not every appliance requires it; our air fryer preheating guide explains when it matters.
Can I Roast Several Garlic Bulbs at Once?
Yes, as long as the protected bulbs fit without crowding the basket or blocking the required airflow. Choose similarly sized bulbs and check them individually for tenderness.
Can I Use Pre-Peeled Garlic From the Grocery Store?
Yes. Check that it is fresh and firm, then follow the covered peeled-clove method at 350°F, beginning to check around 10–12 minutes.
The Key to Soft Air Fryer Roasted Garlic
The easiest way to make air fryer roasted garlic is to protect the cloves from direct airflow, cook at a moderate temperature, and stop when the flesh becomes soft enough to mash.
Use whole bulbs when you want garlic that’s easy to squeeze and spread. Choose the peeled-clove method when you need a smaller batch without dealing with the papery skins.
Either way, let the garlic cool before handling, refrigerate leftovers promptly, and enjoy its mellow flavor in your favorite everyday meals.