10 Quick Meals for Kids: Easy Choices for Busy Days

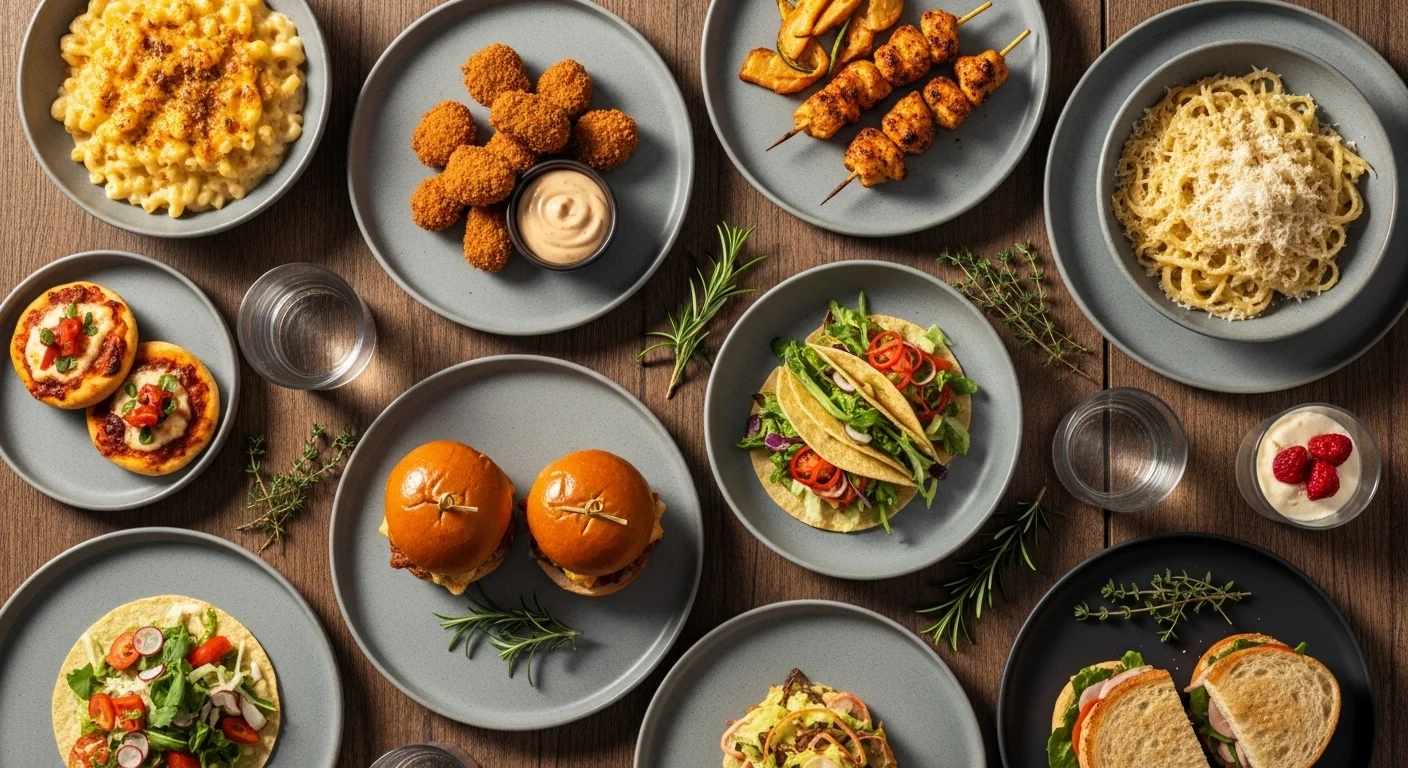
You’re looking at a half-empty refrigerator, your child is hungry, and the recipe you planned needs an ingredient you don’t have. What can you make now? These 10 quick meals for kids start with everyday foods—tortillas, eggs, pasta, bread, cheese, and a few simple extras—so you can choose dinner based on what’s already in your kitchen.
If you have eggs and toast, make breakfast for dinner. If you’ve got tortillas and cheese, make quesadillas. If raw chicken is the only protein available, allow more time for proper cooking rather than rushing it. Below, you’ll find a realistic time guide, simple steps for each meal, and an ingredient-swap matrix that helps you turn one grocery item into several options.
Before you start: All times below are planning estimates, not results from kitchen testing. They assume the listed ingredients are ready and you’re cooking a modest household batch. Thawing, preheating, chopping, extra batches, and food-safety checks can add time. A quick meal is only quick when the starting ingredients fit the plan.
What Can You Make for Kids in 10, 15, or 30 Minutes?
The fastest meal isn’t always the one with the shortest time on a recipe card. A quesadilla made with canned beans and shredded cheese may be ready while frozen raw meat still needs safe thawing. Use this chart to choose a realistic dinner instead of starting something that cannot fit the time you have.
| Meal | Planning window | What needs to be ready | Main timing risk |
|---|---|---|---|
| Mini cheese or bean quesadillas | About 10–15 minutes | Tortillas, cheese, canned beans | Cooking several panfuls |
| Air fryer chicken tenders | About 20–30 minutes, possibly longer | Thawed chicken, coating ingredients | Thickness, preheat, basket batches |
| Quick mac and cheese | About 15–25 minutes | Pasta, cheese and milk | Water heating and pasta cooking |
| Scrambled eggs and toast | About 10–15 minutes | Eggs, bread, washed fruit | Cutting and preparing sides |
| Mini pita pizzas | About 15–20 minutes | Pitas, sauce, cheese | Oven preheat and extra trays |
| Mini sliders or burgers | About 20–30 minutes, possibly longer | Thin, thawed patties or precooked filling | Safe meat temperature and multiple batches |
| Air fryer veggie nuggets | About 15–25 minutes | Packaged frozen veggie nuggets | Package time and basket capacity |
| Buttered pasta with Parmesan | About 15–25 minutes | Quick-cooking pasta, butter, Parmesan | Slow-heating water |
| Easy taco cups | About 15–25 minutes | Small tortillas, fully cooked filling | Heating filling and shaping cups |
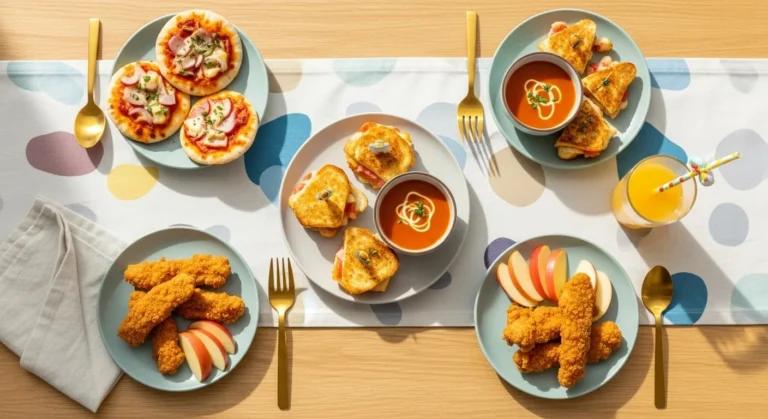
| Grilled cheese and tomato soup | About 15–20 minutes | Bread, cheese, prepared soup | Heating soup and multiple sandwiches |
If you only have 10 minutes, choose a meal using ingredients that are already cooked or need very little heat. With 15 minutes, eggs, quesadillas or a simple sandwich are often more realistic than raw meat. With 30 minutes, you have more choices—but chicken or burgers still need a thermometer check, even when that pushes the meal past your deadline.
Which 10 Quick Meals Can You Make With Everyday Ingredients?
These are flexible meal formats rather than ten standardized, tested recipes. The steps give you a reliable starting sequence; check package directions, your equipment and food temperatures when you cook. Start with the idea that matches your pantry instead of shopping for all ten.
1. Mini Cheese or Bean Quesadillas
Best for: A short meal window and a package of tortillas you want to use up. Plan: About 10–15 minutes for a small batch.
You’ll need: Small tortillas, shredded cheese, and optional drained canned beans. Serve with cut fruit, a vegetable your child likes, or a spoonful of plain yogurt if appropriate.
- Warm a nonstick skillet over medium heat. Keep the pan at a temperature where the tortilla warms without scorching before the cheese melts.
- Spread a little cheese over half a tortilla. Add a thin layer of drained beans if using, then fold it closed.
- Cook for a few minutes on each side, turning carefully, until the cheese melts and the outside is lightly golden. Let it cool briefly before serving.
- Cut into manageable pieces suitable for your child’s chewing skills. Put salsa, avocado or another sauce on the side rather than assuming everyone wants it inside.
Easy swap: Replace beans with already cooked shredded chicken, or use a different cheese that melts well. If you’re using an air fryer instead, follow the practical setup tips in our air fryer quesadilla guide. A crowded pan or basket means extra batches, so don’t promise one large family batch in ten minutes.
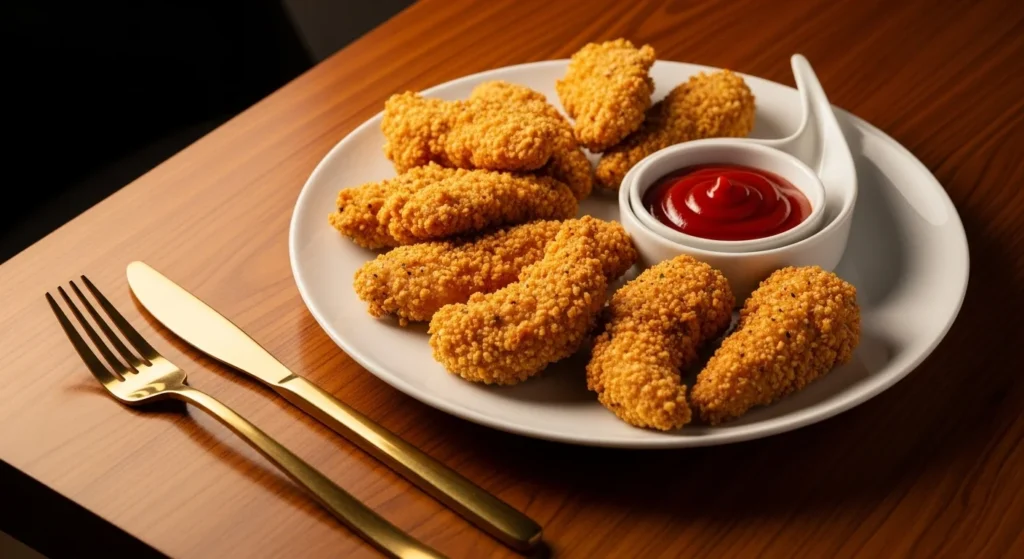
2. Air Fryer Chicken Tenders
Best for: A dinner when you have thawed chicken and enough time to cook it safely. Plan: Around 20–30 minutes for a modest single batch; allow longer if your basket is small.
You’ll need: Thawed chicken tenderloins, a little oil, breadcrumbs or another preferred coating, and simple seasoning. Frozen fries or quick-steamed vegetables can be served alongside—but account for whether they need their own basket time.
- Pat the tenderloins dry, season lightly, and coat with a small amount of oil and breadcrumbs if you want a crisp finish.
- Preheat if recommended by your air fryer, then place pieces in a single layer without stacking.
- Air fry according to the thickness, coating and your appliance’s instructions. Start checking early, turn if needed, and use a food thermometer to confirm the thickest part reaches 165°F (74°C). Do not judge doneness by color alone.
- Serve with a familiar dipping sauce and an easy fruit or vegetable side. Let the pieces cool enough to eat safely.
Easy swap: Use thawed unbreaded tenderloins when the coating step adds too much work. Our air fryer chicken tenderloins guide explains another straightforward preparation. If the chicken is still frozen and you don’t have a suitable from-frozen method, choose one of the faster meat-free options tonight rather than thawing it unsafely on the counter.
3. Quick Mac and Cheese With Optional Vegetables
Best for: A familiar pasta dinner that can use frozen vegetables without more chopping. Plan: About 15–25 minutes, depending on pasta and water-heating time.
You’ll need: Small pasta shapes, a little milk, shredded or grated cheese, and optional peas or finely chopped cooked broccoli. A boxed product is also fine—follow its package instructions.
- Bring a pot of water to a boil while you set out the other ingredients. Cook the pasta until tender according to its package directions.
- If using frozen peas, cook them as directed so they are heated through. Drain the pasta, reserving a small splash of cooking water.
- Return the pasta to low heat or turn off the burner, then stir in milk and cheese gradually. Add a spoonful of cooking water if needed until the sauce coats the pasta.
- Put vegetables on the side or stir them in with the child’s knowledge and preference. Serve at a comfortable temperature.
Easy swap: Use cooked broccoli instead of peas, or add a little leftover cooked chicken if you have it. Avoid promising that “hidden vegetables” will make a child accept them; offering a visible optional side is often easier and more transparent. Cheese and prepared sauces also contain common allergens—check labels when relevant.
4. Scrambled Eggs and Toast
Best for: When the fridge seems empty and you need dinner without a second cooking station. Plan: About 10–15 minutes.
You’ll need: Eggs, bread, a little oil or butter, and washed fruit or soft cooked vegetables that suit the child’s age.
- Wash and prepare the fruit first, using a safe shape and texture for younger children. Set bread near the toaster.
- Whisk eggs in a bowl and warm a nonstick skillet over medium-low heat with a little butter or oil.
- Stir gently until the eggs are fully set, with no visible runny egg, then remove the skillet from the heat. Toast the bread while the eggs cook, without leaving a hot pan unattended.
- Put eggs, toast and fruit on the plate in portions the child can manage. Offer seconds if wanted.
Easy swap: Use a soft tortilla in place of toast to make an egg-and-cheese roll-up. For households with an egg allergy, switch to a bean-and-cheese quesadilla or another suitable option instead of making an unverified egg substitute.
5. Mini Pita Pizzas
Best for: When you have leftover pita bread and want a meal assembled from mostly ready-to-eat foods. Plan: About 15–20 minutes, depending on preheat and batch size.
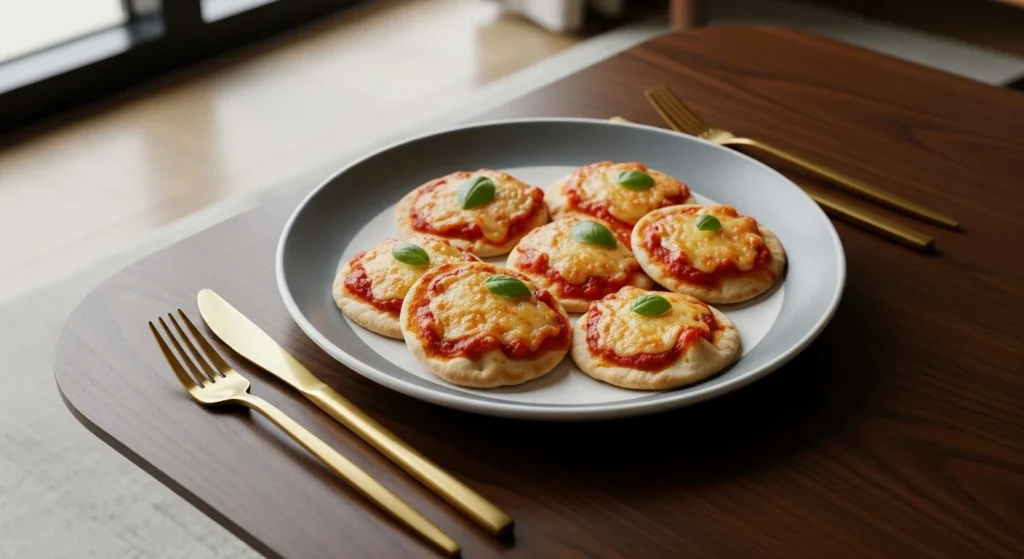
You’ll need: Pitas, tomato sauce or pizza sauce, shredded mozzarella or another melting cheese, and optional cooked toppings such as beans, cooked chicken or finely chopped vegetables.
- Preheat the oven or air fryer according to your equipment. Place pitas on a tray or suitable air fryer surface.
- Spread a thin layer of sauce over each pita, add cheese and keep toppings modest so the bread can crisp without becoming soggy.
- Heat until the cheese is fully melted, the toppings are hot and the edges are lightly browned. The right time varies by oven, pita thickness and toppings.
- Cool slightly and cut into safe, manageable pieces. Keep crunchy or unfamiliar toppings separate if that makes serving easier.
Easy swap: Use an English muffin or a small flatbread if you have no pitas. Avoid adding raw chicken or raw ground meat as a quick topping—they need separate safe cooking first.
6. Mini Sliders or Burgers
Best for: When you already have thin, thawed patties or a fully cooked filling. Plan: Around 20–30 minutes for small batches; raw meat may require longer.
You’ll need: Small buns, thin burger patties, optional cheese, and simple sides such as cooked vegetables. Use ground beef or ground turkey only if you’re prepared to check the internal temperature.
- Have buns and toppings ready before you start cooking. Keeping the patties thin helps them cook more evenly, but thickness and pan heat still affect time.
- Heat a skillet and cook patties in a single layer, turning as needed. For ground beef, check that the center reaches 160°F (71°C); for ground turkey or chicken, reach 165°F (74°C). Check using a food thermometer.
- Add cheese if desired, and assemble sliders on small buns once the patties are fully cooked.
- Offer a soft, age-appropriate side and cut the burger into manageable pieces for younger children.
Easy swap: Use warmed, fully cooked bean patties or an already-cooked shredded filling to shorten the work. Do not rely on a fixed number of minutes to guarantee raw burger doneness; thicker patties or multiple rounds can push the meal past 30 minutes.
7. Air Fryer Veggie Nuggets
Best for: A freezer backup when you don’t have time to shape homemade nuggets. Plan: About 15–25 minutes including setup, depending on the brand.
You’ll need: A commercially packaged frozen vegetable-nugget product, a simple dip and a ready fruit or vegetable side. Check the package for allergens and whether the product is fully cooked or needs thorough cooking.
- Read the package directions first; frozen vegetable nuggets vary considerably in size, coating and required cooking.
- Preheat if the package or appliance calls for it. Spread nuggets in a single layer so hot air can circulate.
- Cook according to the label’s temperature, time and any shaking instructions. Check that they are properly heated and meet any product-specific safety instructions before serving.
- Cool enough to handle and serve with a mild dip or another familiar food.
Easy swap: Use another frozen vegetable side or a premade bean patty, following its own cooking directions. The frozen-food shortcut saves preparation time; homemade nuggets made from fresh vegetables and batter are a different, longer project.
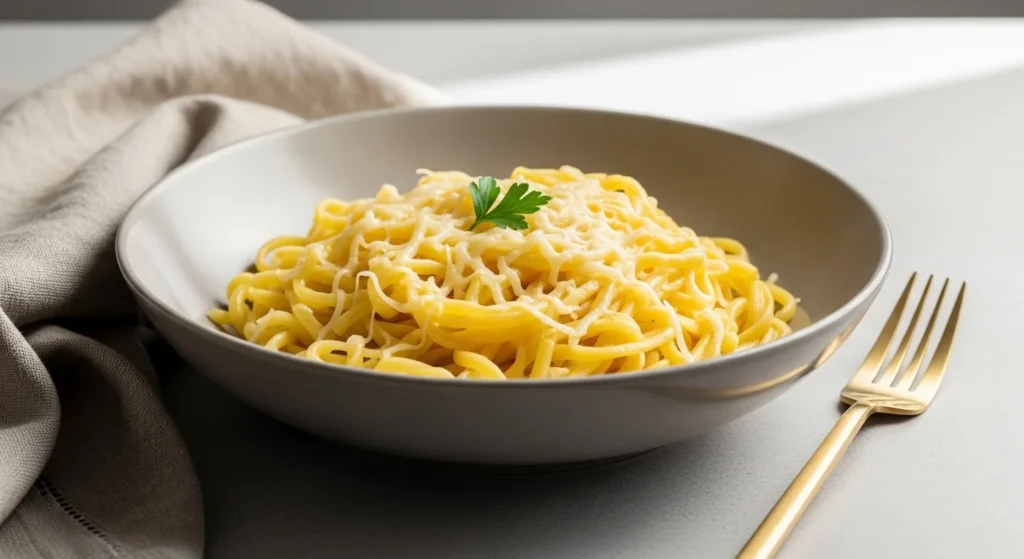
8. Buttered Pasta With Parmesan
Best for: A low-ingredient dinner when you have dry pasta, butter and cheese. Plan: Around 15–25 minutes with quick-cooking pasta.
You’ll need: Pasta, butter, grated Parmesan, and optional peas or soft cooked vegetables. Add a protein already in the refrigerator—such as safely stored cooked chicken—only if it is ready to reheat safely.
- Bring water to a boil and cook the pasta according to the package. Small shapes often help with quick serving, but choose a shape suitable for your child.
- Reserve a little pasta water, then drain. Toss hot pasta with a modest amount of butter and Parmesan until coated.
- Stir in a spoonful of pasta water if needed to help the cheese distribute. Keep herbs or stronger toppings optional.
- Serve with fruit, cooked peas or a different food group if you have it ready. Let hot pasta cool before handing it to a young child.
Easy swap: Use olive oil instead of butter if appropriate for your household, or make a tomato-sauce version with a warmed prepared sauce. If a child prefers plain pasta, serve the sauce separately rather than calling it a separate full meal.
9. Easy Taco Cups With Cooked Filling
Best for: Using cooked beans, already cooked seasoned meat or leftover rice in a different format. Plan: About 15–25 minutes when the filling is ready; not a quick method from raw ground meat.
You’ll need: Small soft tortillas, canned beans or fully cooked filling, shredded cheese and optional mild toppings. A muffin tin makes shaping easier, but a folded tortilla or small bowl is a faster fallback.
- Heat the oven and gently press small tortillas into muffin-tin cups. Bake until the edges hold their shape and the tortillas are warm and lightly crisp; check frequently so the edges don’t scorch.
- While they warm, heat beans or the fully cooked filling thoroughly. Reheat refrigerated leftovers to 165°F (74°C).
- Spoon the hot filling into the warmed tortilla cups, add a little cheese and return briefly to the oven only if you want the cheese melted.
- Let them cool. For younger children, serve filling and softened tortilla pieces separately rather than hard, sharp-edged cups that may be difficult to chew safely.
Easy swap: Turn the same beans, cheese and tortillas into quesadillas when you don’t want to use an oven or muffin tin. If the filling is raw, cook it safely first and expect extra time.
10. Grilled Cheese and Tomato Soup
Best for: A familiar comfort meal with pantry soup and sandwich ingredients. Plan: About 15–20 minutes for a small batch.
You’ll need: Bread, sliced cheese, a little butter or oil and canned or prepared tomato soup. Check the soup label for heating directions and dietary needs.
- Put the soup in a saucepan and heat it according to the package instructions, stirring occasionally. Use a separate burner only if you can supervise both pans safely.
- Assemble the sandwich with cheese between two slices of bread. Lightly coat the outside with butter or oil if you like.
- Toast over medium-low heat, turning carefully, until the bread is golden and the cheese melts through. Lower the heat if the outside is browning before the center is warm.
- Serve the soup at a safe eating temperature, separately from the sandwich if dipping isn’t appealing. Cut the sandwich into manageable pieces.
Easy swap: Use a cheese-and-bean quesadilla if bread is unavailable, or offer a vegetable soup that meets your household’s dietary needs. Multiple sandwiches take longer than one or two, so plan the pan space.

How Do You Choose a Meal Based on What Is Already in Your Kitchen?
When dinner plans fail, choose by ready ingredients, not by the meal name that sounds best. That keeps you from spending twenty minutes waiting for an ingredient to thaw or a second appliance to heat.
- Check what is ready to cook or eat. Canned beans, eggs, tortillas, quick pasta and a bag of frozen nuggets offer different options. Raw frozen poultry is not the same as thawed chicken.
- Pick one base. Use tortillas for quesadillas or taco cups; bread for grilled cheese; pasta for either buttered noodles or mac and cheese.
- Check the active work. Can you supervise a skillet? If not, choose something you can assemble before turning on the appliance and still monitor safely.
- Choose one easy side. Washed fruit or an already-prepared cooked vegetable is often more manageable than starting another full dish.
- Make a backup decision before heating the pan. If you lack the ingredient or the cooking time doesn’t fit, move to eggs and toast or bean quesadillas.
If your main challenge is preparing dinner while children interrupt you, our busy-parent dinner guide focuses on lower-attention cooking and contingency plans.
How Can You Make Quick Kids’ Meals More Balanced Without Extra Cooking?
You don’t need to rebuild a meal from scratch to include variety. Start with what’s on the plate and look for a ready addition: fruit, a cooked vegetable, beans, yogurt or another appropriate protein. Balance across meals and days matters more than making every quick dinner look identical.
- Quesadillas: Add beans to the filling or serve with fruit.
- Pasta: Offer cooked peas or a small bowl of fruit beside it; use leftover cooked chicken if appropriate and safely reheated.
- Eggs and toast: Add washed, age-appropriate fruit or a soft cooked vegetable.
- Mini pizzas: Include a vegetable topping if wanted, or serve vegetables separately.
- Grilled cheese: Pair with soup or fruit, checking soup salt and allergen ingredients as needed.
Don’t disguise ingredients that a child is allergic to, or assume a vegetable must be hidden to be useful. If food refusal or texture sensitivity is the main issue, see our separate familiar-food approach for selective eaters.
For younger children: The food’s shape, size and texture matter as much as the meal name. The CDC’s choking-hazard guidance advises preparing food appropriately for a child’s development, avoiding hard or round choking hazards, and supervising children while seated during meals. Whole grapes, hard raw carrot pieces and large chunks of meat are not suitable for a young child’s plate as-is.
What Can You Prepare Ahead Without Making Meals Repetitive?
Prepare components instead of fully assembling every meal. The same tortilla can hold cheese one day and warm beans another; the same pasta can become buttered noodles or mac and cheese. This reduces last-minute decisions without leaving a lineup of identical dinners in the refrigerator.
- Wash and portion produce: Keep ready fruit and vegetables in appropriate storage containers, then cut them into safe shapes when serving.
- Grate or portion cheese: Use some for pizzas, quesadillas and pasta. Store according to the package.
- Keep a pantry backup: Tortillas, dry pasta, canned beans and shelf-stable soup can support several of the ideas above.
- Cook protein only when there’s a plan to store it safely: Refrigerate it promptly, date the container and use or freeze it within safe storage limits.
- Store toppings separately: Wet ingredients can make tortillas or bread soggy, and separated ingredients are easier to use in other combinations.
FoodSafety.gov recommends storing cooked meat or poultry leftovers in a refrigerator at 40°F (4°C) or below for 3–4 days. Cool and refrigerate per safe food-handling guidance; do not keep cooked rice, meat or egg dishes sitting at room temperature for an extended period. Reheat leftovers to 165°F (74°C) before serving. Check the cold-food storage chart and the safe-temperature chart rather than guessing based on smell or appearance.
For family dinners involving different tastes, the one-meal, flexible-plates approach shows how to keep shared ingredients separate until serving.
How Can You Adapt These Meals for Different Ages and Preferences?
The term “kid-friendly” covers a wide range of eating abilities. A school-age child may manage a small crisp quesadilla, while a younger child may need a softer tortilla, finer pieces and closer supervision. Don’t serve an adult-style plate without considering chewing skills and choking risk.
Try these simple adjustments:
| Meal | For a younger child who is ready for these foods | For an older child |
|---|---|---|
| Quesadilla | Softer tortilla pieces; mash beans as appropriate | Folded wedges with optional dip |
| Chicken tenders | Fully cooked, soft manageable pieces | Small whole tenders or strips |
| Mac and cheese | Soft pasta in manageable portions | Add vegetables or protein if desired |
| Burgers | Soft bun and appropriately prepared patty pieces | Mini slider assembled at the table |
| Taco cups | Soft tortilla pieces and mashed beans | Crisp cups with separate topping choices |
These are general serving ideas, not age-based medical advice. If your child has swallowing difficulty, a history of choking, significant feeding problems or a diagnosed food allergy, follow individualized professional guidance. Always consider the child’s developmental skills and supervise eating.
Bonus Value: The 10-Meal Ingredient Swap Matrix
Instead of buying ten separate meal kits, look at what a single ingredient can do in two or three recipes. This 10-meal ingredient swap matrix helps when you’re missing one item or trying to use groceries before they spoil.
| Ingredient or situation | First meal choice | Second meal choice | What changes? |
|---|---|---|---|
| Tortillas + cheese | Mini quesadillas | Taco cups | Taco cups need oven time and ready filling |
| Pita or flatbread + cheese | Mini pita pizzas | Cheese-and-tomato flatbreads | Use thin sauce; topping stays optional |
| Pasta + grated cheese | Buttered pasta | Quick mac and cheese | Milk and a sauce step change the texture |
| Eggs + bread | Scrambled eggs and toast | Egg-and-cheese tortilla | Swap the bread base for a tortilla |
| Canned beans | Bean quesadillas | Taco cups | Heat beans thoroughly; mash for younger children |
| Thawed chicken | Breaded chicken tenders | Unbreaded tenderloins | The coating step changes prep and crispness |
| Frozen veggie nuggets | Air fryer nugget plate | Nugget-and-soft-vegetable plate | Keep package instructions; change the side |
| Thin burger patties | Mini sliders | Deconstructed burger plate | Same safe doneness; simpler serving format |
| Bread + cheese | Grilled cheese | Toasted cheese bread with soup | Add soup only when available |
| Prepared tomato sauce or soup | Mini pizzas | Grilled cheese with tomato soup | Check whether you have a sauce or a ready-to-heat soup |
Five-staple shopping checklist: Keep the versions your household actually eats: tortillas, quick-cooking pasta, eggs, shredded cheese, and frozen vegetables. These five items do not make all ten dinners on their own; they give you a flexible starting point. Add beans, bread, pitas, meat or prepared soup as your budget, storage space and family’s preferences allow.
The 30-second decision: Ask, “What base do I have, what can I safely cook now, and which side requires no extra pan?” Choose the first meal that fits all three. If none does, make the pantry backup rather than continuing to search recipes while everyone waits.
For more ideas using short ingredient lists, browse our five-ingredient air fryer dinner guide. The broader family dinner planning guide is useful when you want to plan beyond tonight.
Frequently Asked Questions About Quick Meals for Kids
What can I make for kids when I only have 15 minutes?
Scrambled eggs and toast, simple cheese quesadillas, and grilled cheese are reasonable options when the ingredients are ready. A preheated pan, multiple servings or an extra side may add time. Skip meals involving raw meat if you cannot allow enough time to check safe doneness.
Which quick meals require the fewest ingredients?
Buttered pasta with Parmesan, cheese quesadillas, eggs and toast, and simple mini pita pizzas can each start with a short ingredient list. They won’t always be a complete meal by themselves, so add a ready fruit, vegetable or protein when practical.
Can I prepare these meals without an air fryer?
Yes. Quesadillas, scrambled eggs, pasta, grilled cheese and soup can all be made with basic stovetop equipment. Mini pita pizzas work in an oven, while veggie nuggets should follow their package instructions, which may list oven directions.
How can I add variety without buying extra groceries?
Change the format instead of the whole ingredient list. Tortillas with cheese can become quesadillas or taco cups; pasta can be served with butter or a simple cheese sauce. Add a different side when you have one available instead of preparing a separate dinner.
Which ingredients are useful to keep ready for quick meals?
Choose a small set your family already uses: tortillas, quick-cooking pasta, eggs, cheese and frozen vegetables. Canned beans, prepared soup, pitas and safely stored cooked protein expand the choices. Follow storage labels and don’t prepare more leftovers than you can use safely.
A quick meal doesn’t need to be complicated or identical every night. Start with what’s ready, choose a format that fits your time, and use one or two reliable swaps to make dinner easier without buying a completely new set of groceries.