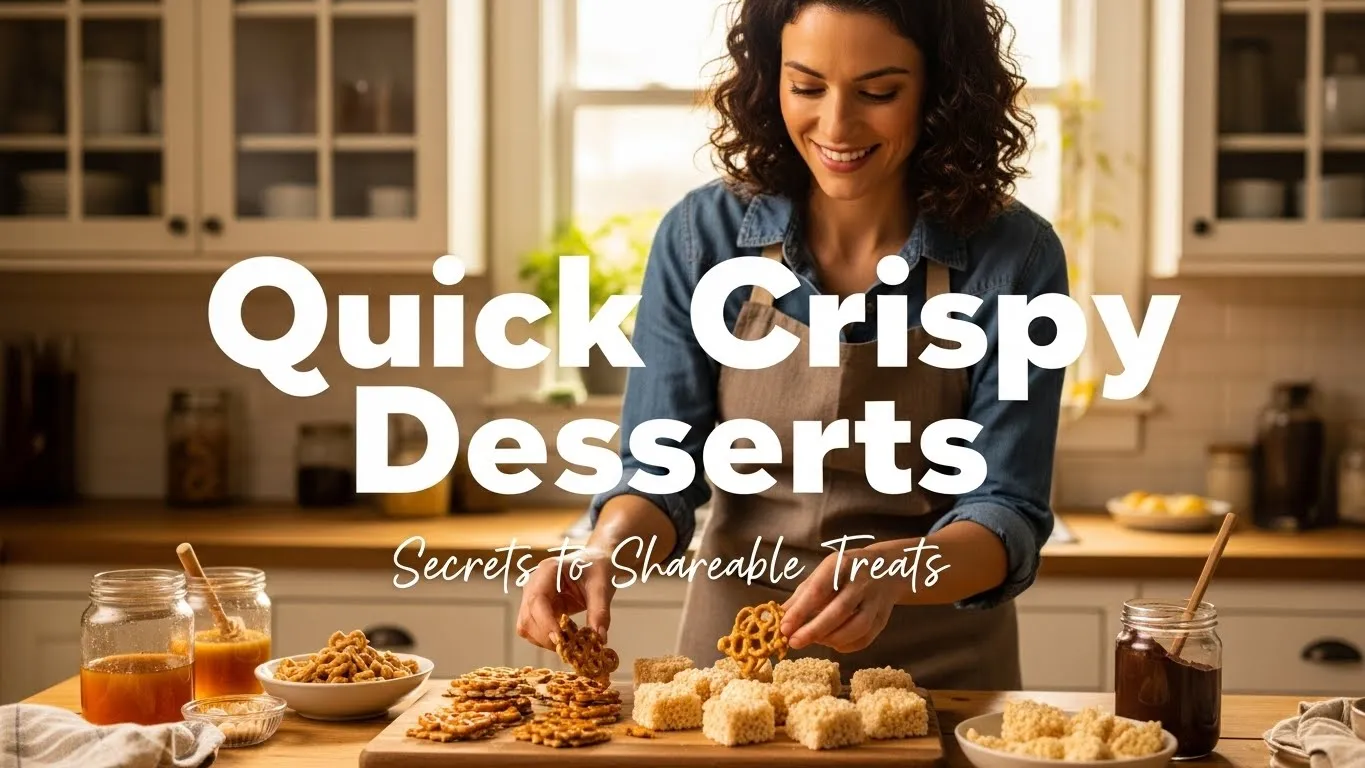
Quick Crispy Desserts for a Crowd:
If you need fast desserts for a crowd, focus on:
- No-bake options for speed
- Sheet pan desserts for large groups
- Crispy textures that hold up
- Simple ingredients to keep costs low
Stick to these, and you’ll always have something that works.
If you’ve ever had to make dessert for a crowd, you know the struggle. You need something quick, easy, and big enough to feed everyone without turning soggy or falling apart.
If you’ve ever struggled with soggy desserts, these tips for crispy results in the air fryer can help you get that perfect crunch every time.
That’s where crispy desserts come in. They’re fast to make, easy to scale, and hold their texture way better than soft or creamy desserts.
In this guide, you’ll find quick crispy dessert ideas, including 15-minute recipes, make-ahead options, and simple ways to feed 20, 30, or even 50 people without stress.
What Makes a Dessert Perfect for a Crowd?
A good crowd dessert is easy to scale, quick to prepare, and holds its texture without getting soggy.
Here’s what actually matters:
- Easy to multiply without messing up ratios
- Simple ingredients you can buy in bulk
- Easy to serve like bars or bite-sized pieces
- Holds texture so it doesn’t turn soft or sticky
Crispy desserts check all these boxes, which is why they work so well for parties and potlucks.
If you’re juggling weeknight chaos with family gatherings, check out these stress-free family meals in 30 minutes for more ideas that pair perfectly.
Quick Crispy Desserts for a Crowd (Best Picks)
These are the types of desserts that consistently work when you need something fast and reliable.
No-Bake Crispy Desserts (Fastest Options)
Perfect when you don’t want to turn on the oven.
- Rice Krispie treats
- Pretzel chocolate bark
- Cereal clusters with peanut butter or honey
- Popcorn snack mix with chocolate drizzle
Why they work:
- Ready in minutes
- Easy to double or triple
- Stay crispy for hours
These also work great alongside air fryer desserts for movie night when you want variety.
Sheet Pan Crispy Desserts (Feeds 20–50 People)
If you’re feeding a big group, this is your best option.
- Brownie bars with crispy edges
- Saltine toffee bark
- Cookie bars baked in a sheet pan
- Crispy cereal bars in large trays
Why they work:
- One batch feeds dozens
- Easy to cut into portions
- Great for transport
Air Fryer Crispy Desserts (Quick Batches)
Great for small to medium groups or fresh batches.
- Churro-style cinnamon crisps
- Air fryer tortilla chips with sugar
- Mini cookies with crispy edges
Why they work:
- Fast cooking
- Perfect crisp texture
- No need to preheat a full oven
Cheap Crispy Desserts for a Crowd
If you’re on a budget, these are your go-to options.
- Saltine cracker toffee
- Cereal bars with simple ingredients
- Popcorn snack mix
- Cornflake clusters
Why they work:
- Low-cost ingredients
- Easy to scale
- Still taste amazing
8 Crowd-Pleasing Recipes: Quick, Crispy, and Shareable
We’ve curated these eight gems to cover every vibe from classic no-bakes to air-fryer zips all yielding 24+ servings so you can feed the masses without fuss. Each one’s designed for easy scaling, with why-it-works notes to build your confidence. Grab your apron; we’re making memories one crunch at a time.
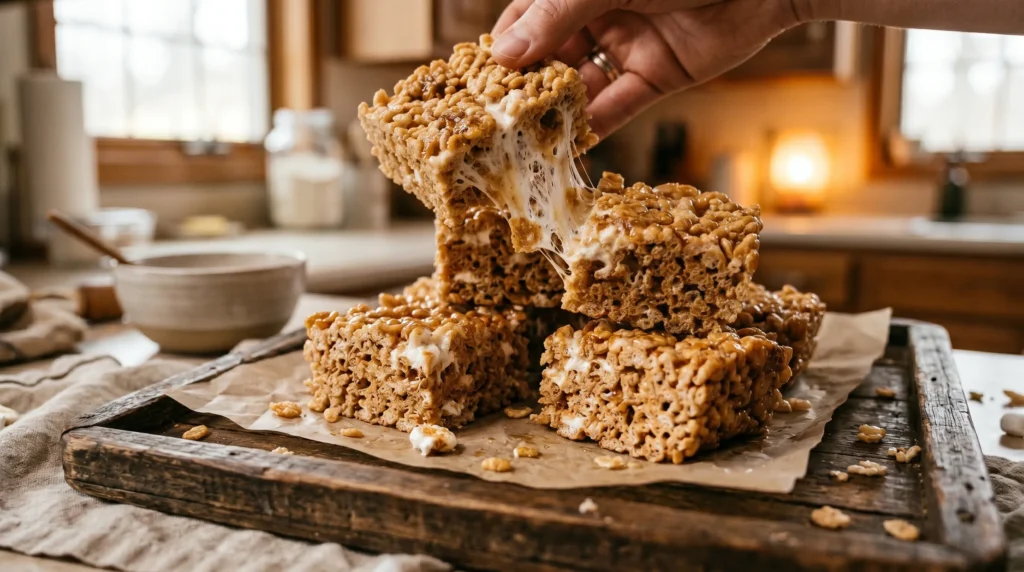
1. Giant Toasted Rice Krispie Squares (15 mins, 48 servings)
This upgraded classic swaps boring for browned butter magic, yielding massive, chewy-crisp slabs that disappear fast. The toasting step? It releases nutty aromas that make plain marshmallows taste gourmet perfect for potlucks where you want “oohs” without effort.
Ingredients (scale up by 1.5x for 72 servings):
| Item | Amount |
|---|---|
| Unsalted butter | 1 cup (2 sticks) |
| Mini marshmallows | 16 cups |
| Rice Krispies | 20 cups |
| Vanilla extract | 2 tsp |
| Sea salt | 1 tsp (optional) |
- Melt butter in a huge pot over medium heat until it foams and browns lightly (about 5 mins) this builds flavor depth without burning.
- Stir in marshmallows until gooey (2 mins), then fold in vanilla and salt.
- Off heat, mix in cereal gently press into a greased half-sheet pan (or two for mega batches). Cool 10 mins, slice into 2-inch squares.
Pro tip: Chill briefly for extra snap, but serve at room temp to avoid tough bites. Why it scales: The ratio stays foolproof, just use bigger pans.
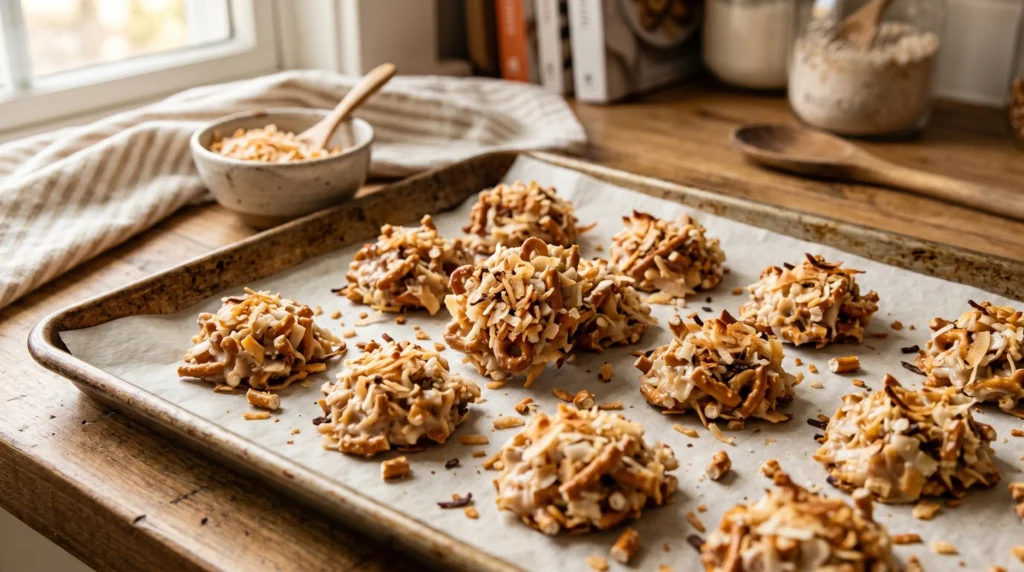
2. Pretzel-Chocolate Bark Bites (10 mins, 30 servings)
Shatter this into bite-sized shards for grab-and-go bliss the pretzel’s salt cuts chocolate’s richness, creating addictive contrast that’s a hit at game nights. No tempering needed; it sets fast for last-minute wins.

Ingredients:
| Item | Amount |
|---|---|
| Semi-sweet chocolate chips | 4 cups |
| Mini pretzels | 6 cups |
| Chopped pecans | 1 cup (optional) |
| Flaky sea salt | To taste |
- Microwave chocolate in 30-sec bursts, stirring until smooth (3 mins total).
- Spread pretzels on parchment-lined baking sheets, drizzle chocolate evenly, sprinkle nuts and salt.
- Freeze 5 mins, break into pieces.
Variation: Swap pecans for dried cranberries for a fruity twist. It stays crispy because chocolate seals the pretzels from air genius for humid days. If air-frying’s your jam, try layering these in for a warmer crunch; our 10 quick crispy air fryer desserts has similar vibes.
3. Cornflake Honey Clusters (12 mins, 36 servings)
These golden nuggets cluster like nature intended, with honey’s stickiness locking in cornflake crunch for a healthier-ish treat kids devour. The quick bake (or air-fry) toasts without drying, ideal for brunch crowds.
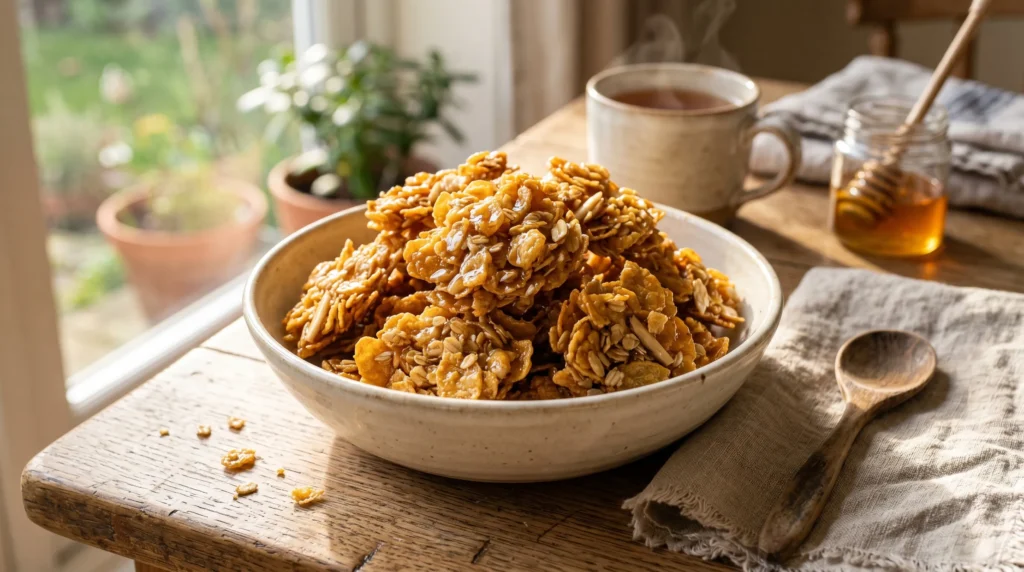
Ingredients:
| Item | Amount |
|---|---|
| Cornflakes | 8 cups |
| Honey | 1 cup |
| Peanut butter | ½ cup |
| Cinnamon | 1 tsp |
- Warm honey and peanut butter in a saucepan until bubbly (3 mins).
- Toss with cornflakes and cinnamon, drop spoonfuls on lined trays.
- Bake at 300°F for 7 mins (or air-fry at 320°F for 5) for golden edges. Cool to set.
Why it works: Honey caramelizes just enough for chew-crisp balance. For family movie nights, these pair great with easy air fryer treats for movie night.
4. Saltine Toffee Crunch (20 mins, 40 servings)
Transform humble crackers into candy-bar rivals with this foolproof boil-and-bake method the toffee hardens to a shatter that screams “share me.” It’s budget magic for holiday spreads.
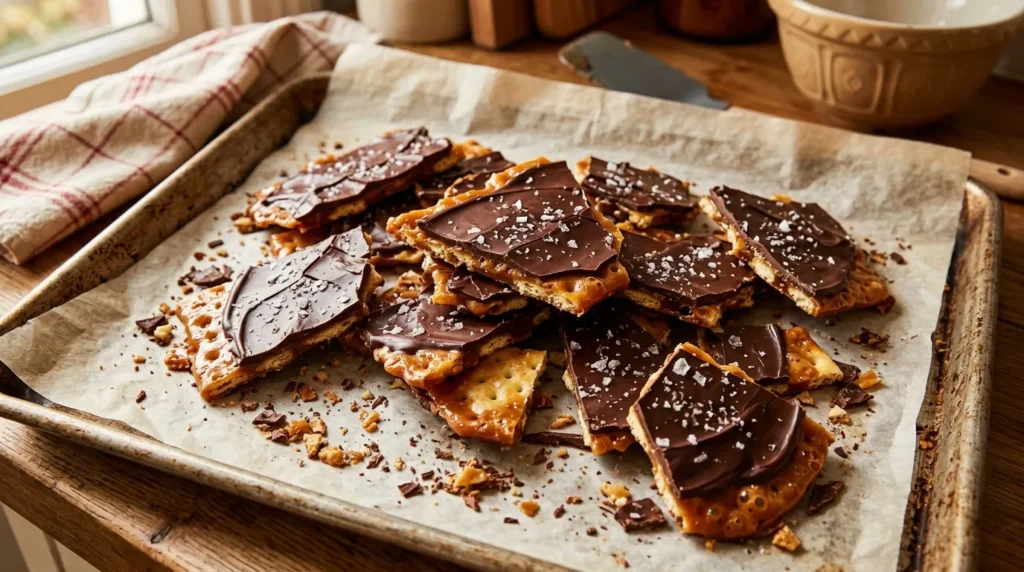
Ingredients:
| Item | Amount |
|---|---|
| Saltine crackers | 40-50 |
| Butter | 1 cup |
| Brown sugar | 1 cup |
| Chocolate chips | 2 cups |
| Chopped almonds | ½ cup |
- Line a sheet pan with foil and crackers.
- Boil butter and sugar 3 mins, pour over crackers, bake at 350°F for 5 mins.
- Sprinkle chips to melt, top with almonds, cool and break.
Packaging tip: Layer in tins for gifting. The boil ensures even caramel without graininess your secret weapon against candy fails.
5. Peanut Butter Cereal Bars (15 mins, 24 servings)
Microwave these for zero-oven ease, yielding chewy bars with a peanutty punch that holds up in lunchboxes or picnics. Gluten-free? Swap the cereal seamlessly.
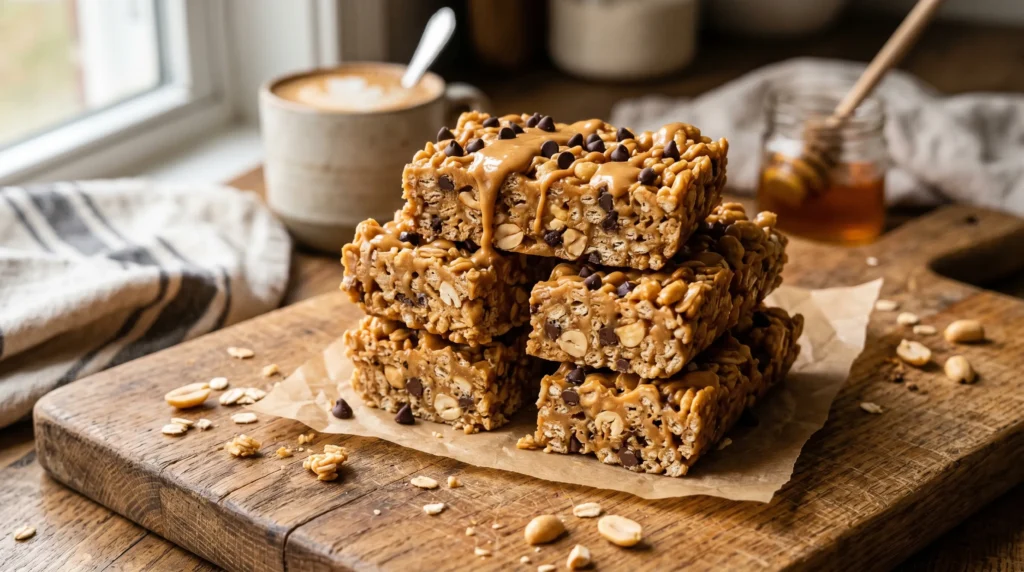
Ingredients:
| Item | Amount |
|---|---|
| Crispy rice cereal | 6 cups |
| Peanut butter | 1 cup |
| Corn syrup | ½ cup |
| Sugar | ½ cup |
| Vanilla | 1 tsp |
- Microwave peanut butter, syrup, and sugar 2 mins, stir in vanilla.
- Fold in cereal, press into pan, chill 10 mins, cut.
Gluten-free swap: Use certified GF cereal. Why batch-friendly: Sticks together like glue, no crumbling.
6. Churro-Inspired Cinnamon Crisps (18 mins, 32 servings)
Dust tortilla crisps with cinnamon-sugar for a fried-fair vibe minus the oil splatter, air fryer optional for speed. This fills the baked crisp gap, dazzling taco-night dessert seekers.
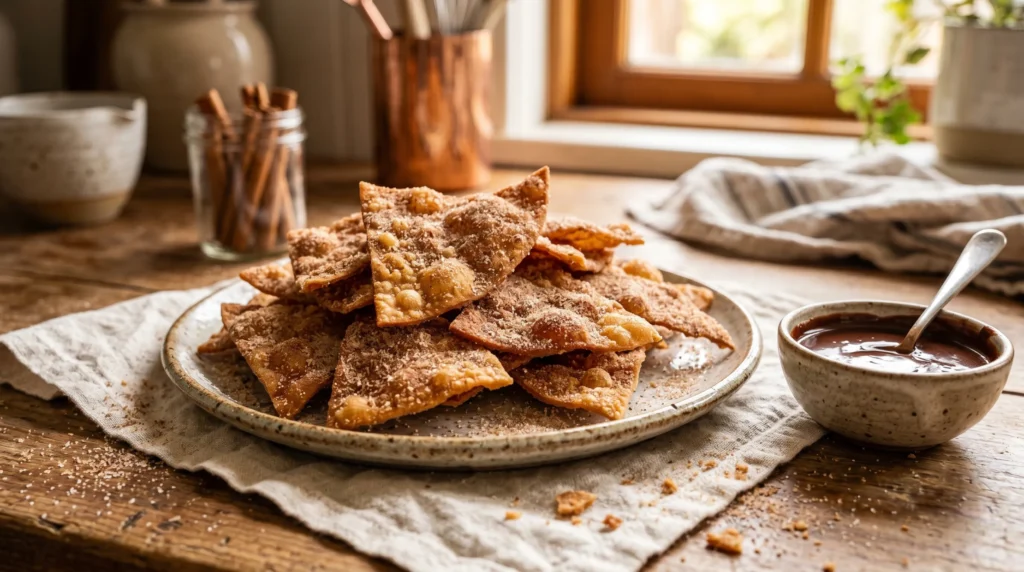
Ingredients:
| Item | Amount |
|---|---|
| Flour tortillas | 8 large |
| Butter, melted | ¼ cup |
| Cinnamon-sugar mix | ½ cup |
| Chocolate dip | 1 cup melted |
- Brush tortillas with butter, sprinkle mix, cut into wedges.
- Air-fry at 350°F for 6 mins per batch (or bake same temp).
- Serve with dip.
Dipping idea: Warm Nutella. It crisps fast thanks to thin layers, pure party fuel.
7. Coconut-Pretzel Clusters (10 mins, 28 servings)
Drop these no-bake beauties for tropical crunch, coconut toasts lightly, binding pretzels into chewy clusters. Vegan by default, they’re a breeze for allergy-aware groups.
Ingredients:
| Item | Amount |
|---|---|
| Shredded coconut | 2 cups |
| Pretzel pieces | 4 cups |
| Sweetened condensed coconut milk | 1 can |
| White chocolate | 1 cup melted |
- Toast coconut 3 mins in microwave, stir in milk and pretzels.
- Drop clusters, drizzle chocolate, chill to set.
Vegan adaptation: Skip chocolate or use dairy-free. The toast prevents chewiness, keeps ’em snappy for hours.
8. Mixed Cereal Crunch Mix (8 mins, 50 servings)
Toss for a customizable trail-mix dessert, great for themed events. Chill sets the honey glaze, locking in multi-cereal pops.
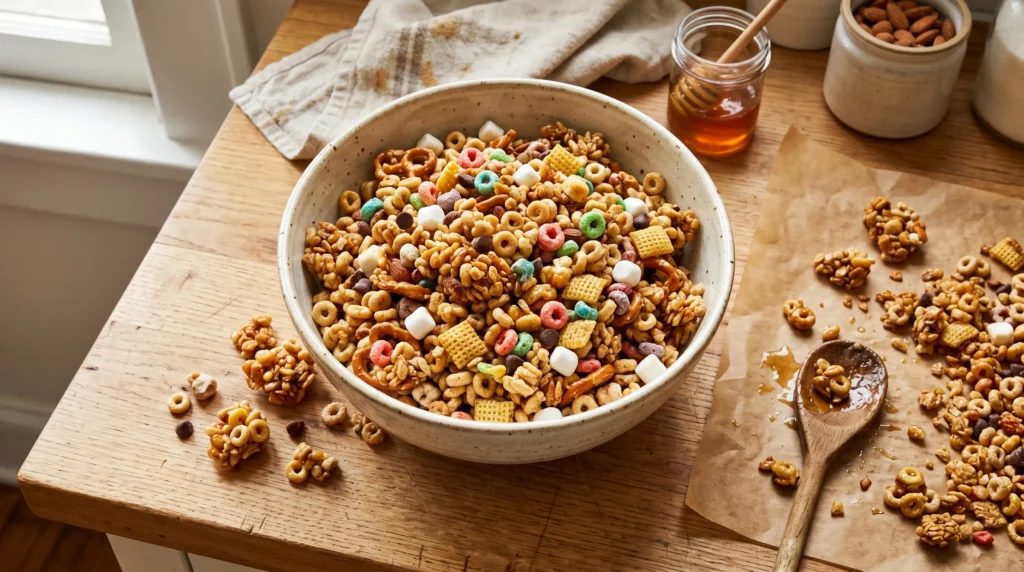
Ingredients:
| Item | Amount |
|---|---|
| Mixed cereals (Chex, Krispies) | 10 cups |
| Honey | ½ cup |
| Butter | ¼ cup |
| Dried fruit/nuts | 2 cups |
- Melt honey and butter, toss with cereals and add-ins.
- Spread on trays, chill 5 mins, break into handfuls.
Customizable: Holiday spices or candy bits. Why it scales: Just multiply and divide pans, endless fun.
🍰 Dessert Crowd Calculator
Scale your recipe perfectly for any crowd size
You can also explore more easy air fryer desserts you can make in minutes if you want quick sweet options beyond these.
Pro Tips to Keep Your Crisps Crowd-Ready
Maintaining That Irresistible Crunch
Humidity’s the enemy, so store in airtight bins with silica packs to trap moisture, your treats stay snappy for days. For transport, wrap in parchment bundles; it breathes without wilting.
If air fryer’s in play, preheating prevents steam buildup see our how to preheat an air fryer guide.
Scaling and Customizing for Any Event
Double recipes by upping binders 1.5x (not 2x) to avoid density, simple math keeps ratios golden. Theme it: Red sprinkles for holidays, or match your family dinner ideas everyone will actually eat spread.
🎯 Air Fryer Dessert Stats You’ll Love
The numbers prove it: Air fryers are dessert game-changers!
Than traditional ovens
Save money & planet
Dessert ready fast!
🏆 Most Popular Air Fryer Desserts
👶 Kid-Approved Favorites
💡 Quick Facts
⏰ Time Saved Comparison
How Many Desserts Do You Need for a Crowd?
Here’s a simple guideline:
| Crowd Size | Servings Needed |
|---|---|
| 20 people | 30–35 pieces |
| 30 people | 45–50 pieces |
| 50 people | 70–80 pieces |
Tip:
Always make about 20% extra. People usually come back for seconds.
Make-Ahead Crispy Desserts That Stay Fresh
Some desserts actually work better when made ahead.
Best options:
- Rice Krispie treats
- Toffee bark
- Cookie bars
- Cereal clusters
Storage tips:
- Use airtight containers
- Keep at room temperature
- Avoid humidity
Most crispy desserts stay fresh for 1–3 days if stored properly.
Common Mistakes That Ruin Crispy Desserts
These are the things that usually go wrong.
- Humidity exposure
Makes everything soft - Overcrowding trays
Leads to uneven texture - Too much liquid ingredients
Kills crispiness - Wrong storage
Letting air in = soggy desserts
Fixing these alone can completely change your results.
How to Keep Desserts Crispy for a Party
If you want that perfect crunch, do this:
- Store in airtight containers
- Add a paper towel to absorb moisture
- Keep desserts in a cool, dry place
- Avoid stacking too tightly
For transport:
Wrap in parchment instead of sealing completely.
Best Dessert Types for Large Crowds (Quick Comparison)
| Dessert Type | Best For | Why |
|---|---|---|
| Bars | Large groups | Easy to cut and serve |
| No-bake | Fast prep | No oven needed |
| Sheet pan | 30+ people | One big batch |
| Air fryer | Small batches | Quick crisp texture |
Quick Tips for Perfect Crispy Desserts
If you want your desserts to stay crispy and crowd-ready, focus on these basics.
Keep Everything Crisp
- Don’t overcrowd trays or baskets
- Use light oil for better browning
- Cook at steady heat, around 320–350°F
- Let desserts cool before storing
If crispiness is an issue, follow these tips for crispy results in the air fryer.
Frequently Asked Questions
Can I make desserts ahead for a crowd?
Yes, most crispy desserts can be made 1–2 days ahead and stored in airtight containers.
What is the cheapest dessert for a crowd?
Cereal bars, popcorn mix, and saltine toffee are some of the most budget-friendly options.
How do you keep desserts from getting soggy?
Store them in airtight containers and keep them away from humidity.
What desserts feed the most people?
Sheet pan desserts and bars are the easiest way to feed large groups.
Can I use an air fryer for desserts in bulk?
You can, but it’s better for small batches. For large crowds, use sheet pan methods.